Troubleshooting Guide – Software Version 5.0
Error – Not Sensing Temperature Properly
- Press END PROCESS button on display.
- Take food out of freeze dryer and place in your freezer.
- Power off freeze dryer.
- Check to see if shelf cable is securely connected.
- If it is connected then check to see if pins are securely in place.
- Watch the video: “Shelving Plug Connections”.
- Once you have done these things, reconnect cables and power on your freeze dryer.
- On the START SCREEN, press the circled leaf in top left corner. It will display a test screen that shows a tray temperature. If it shows a temperature rather than dashes it is functioning properly.
- Go ahead and run your freeze dryer.
- If you still see dashes, rather than a tray temperature, please call Support at 800-865-5584.
Error – Not Detecting Heat
System is not detecting increase in heat. Temperature is being measured, but, there is not detected heat.
- Press CONTINUE.
- This may resolve the problem. If it does not resolve the problem, in a few minutes, the display will again state “Not Detecting Heat.”
- Press END PROCESS button on display.
- Take food out of freeze dryer and place it in your freezer.
- Power off freeze dryer.
- Check to make sure that the shelf cable is securely connected.
- If it is connected, then make sure all the pins coming into the red part of the connector are securely in place. Watch the video: “Shelving Plug Connections”.
- Once you have done these things, reconnect the cables and power on your freeze dryer.
- On the START SCREEN, press the circled leaf in the top left corner. It will display a test screen. On that screen there is a HEATER button. Press it and it will display “ON”. Wait for a couple minutes and then touch the heater pads that are below each shelf where the trays are placed. If they are warm, everything is working correctly. If they aren’t warm, go to the next steps.
- It is possible that the heater relay is stuck open and you are not getting heat. You can check this out by watching the “Testing Computer Relays” video.
- If this test indicates that the heater relay is stuck and won’t heat, you should get a new computer relay board from Harvest Right and follow the instructions in the “Relay Board Replacement” video.
Error – Mid-batch Heater Failure – Heater Relay Failure
System is not detecting an increase in heat during DRY and/or FINAL DRY processes.
- Heaters were working, food was getting dry, and the firmware senses that the heaters have quit working. This is nearly always a sign that the computer relay for the heaters is stuck open.
- Do the following:
- Press the CONTINUE button. This may resolve the problem. If it does not resolve the problem in a few minutes the display will again state “Mid-Batch Heater Failure.”
- Then Press END PROCESS button
- This will take you to the PROCESS COMPLETE screen. Open your drain valve. Remove your food and put it in the freezer.
- Press DEFROST. Wait a few minutes to see if heaters are warming. Place your hand under each shelf to see if all the heater pads are getting warm. If they are getting warm, place your food back in the freeze dryer and start batch again.
- If your heaters do not get warm, then check to see if your heater cable has wires pulled out of it; insure that it is connected properly. You can do this by watching: “Shelving Plug Connections”.
- If the heater cable is connected and the wires are not the problem, then it could be that the computer heater relay is faulty. You can check this out by watching the video titled “Testing Computer Relays”.
- If this test indicates that the heater relay is stuck and won’t heat, you should get a new computer relay board from Harvest Right and follow the instructions in the “Relay Board Replacement” video.
Error - Detecting too much heat - Heater Relay Failure
- You should have powered off your freeze dryer and unplugged it from the wall.
- Computer Heater Relay, that turns on heaters, is stuck closed.
- This is a dangerous condition.
- When the firmware detects 180°F, or higher, the system sends an on-screen message urging you to power off and unplug the freeze dryer.
- Once the unit has cooled down, you can test for this condition by just powering on the freeze dryer. If the heater relay is stuck open it will cause the heaters to be on even though the START button hasn’t been pressed.
- At this point (with your unit powered OFF) you can check to see if the heaters are on by waiting for a few minutes. Touch the heater pads beneath the shelves to see if they are warm. If they are heating, your system has a faulty heater relay. To resolve this condition, you will likely need to replace the entire computer relay board. To do this, get a computer relay board from Harvest Right and follow the instructions in the “Relay Board Replacement” video.
Error – Freeze Dryer Not Cooling – Firmware is detecting that the unit is not cooling at all.
- Power off your freeze dryer and power it back on. Listen for the refrigeration condenser to start.
- If you hear it running, press START, then press NOT FROZEN and continue the process.
- If you again get the message “Freeze Dryer Not Cooling”, press END PROCESS.
- Take the food out of the unit and place it in your freezer. Then start the unit and press circled leaf in the top left corner. This takes you to a test screen.
- At this point, press the “Freeze” button to “ON”. Let the unit run for an hour with the door open.
- If no cooling or frost pattern on the inside of the chamber is detected, it could be either a refrigeration condenser failure or a refrigeration relay failure.
- Non-functioning Refrigeration Condenser
- Listen to see if refrigeration condenser is coming on. Can you feel air blowing from the fan?
- Relay Failure? To determine if there is a computer relay failure, watch the “Testing Computer Relays” video.
- If you determine that the computer relay for freezing is not working, you will need to get a complete computer relay board from Harvest Right and install it according to the instructions found in the “Relay Board Replacement” video.
Download PDF
Error - Not Getting Cold Enough. The system won’t start the Dry process.
The system won’t start the dry process because the material/food hasn’t been able to get cold enough.
- Press CONTINUE and let it continue freezing.
- If you get the message again (Not Getting Cold Enough), the system may have a Refrigerant Problem. It is possible that there is not the proper amount of refrigerant in the condenser. There may be a leak.
- You will need to call a refrigerator repairman and have him follow Harvest Right’s instructions for finding leaks and for charging the unit with refrigerant. These instructions can be found in the PDF: “Refrigeration Repair Information”.
- Or you can send the unit to Harvest Right and we will repair it. If the unit is out of warranty, that will be done at a rate of $90 per hour.
Error – Vacuum Sensor Not Working
Harvest Right’s software checks for a vacuum sensor error when the freeze dryer is powered on and the “Start” button is pressed. If the unit registers a vacuum that is lower than 2500 mT, even though the vacuum pump is turned off, it will report a “Vacuum Sensor Error”. Although rare, this would signal the need for a new vacuum sensor.
The more likely cause for the error is that the “Start” button was pressed while the chamber was still under vacuum from a previous operation.
For instance, after running a vacuum test, you press “Start” to begin a new batch. This will cause a “Vacuum Sensor Error” because the chamber is still under pressure. Another example is if you are in the middle of a batch, while the vacuum pump is running, and need to start over. This, too, will cause a “Vacuum Sensor Error” because the chamber is under pressure when “Start” was pressed.
To get rid of the error, simply open the drain valve. This will release the pressure in the chamber. Next, bring the freeze dryer back to the “Start” screen by powering it off and back on. The vacuum error should now be gone when you press “Start”.
a. If opening the drain valve to release the pressure doesn’t solve this problem, then you may have to actually replace your vacuum sensor.
b. You can purchase a vacuum sensor from Harvest Right’s Support Department.
c. Watch the “Replacing Vacuum Sensor” video.
Error – Unable to Achieve Vacuum. Vacuum Failure at the beginning of Vac Freeze (make sure Drain Valve is completely closed)
- Check the following:
- Is the vacuum pump securely plugged into the back of the freeze dryer and is it powered on?
- Check to see if the drain valve is closed.
- Is the door latch securely closed with no impediments between the door and the door gasket?
- Is the vacuum hose securely tightened to the connections on the freeze dryer and the vacuum pump.
- If none of these check out as being the problem, then go through the PDF: Vacuum Error Solutions. You can also watch the video: “Vacuum Errors”.
Download PDF
- Make sure drain valve is completely closed.
- Clean door gasket.
- Tighten vacuum hose fittings on freeze dryer and vacuum pump.
- Food may not be frozen adequately when the vacuum pump turns on during the Vac Freeze or Drying cycles.
- If none of these solve the problem you should go completely through the PDF: Vacuum Error Solutions. You can also watch the video: “Vacuum Errors”.
Download PDF
Download PDF
Error – Mid-Batch Vacuum Failure. Vacuum Failure in the middle of a batch. The vacuum was pulling then stopped
- Someone may have opened the drain valve. Check to ensure that it is closed.
- Vacuum pump problem. Need to remove food (put in freezer). Defrost chamber and dry it out. Remove shelf and run a vacuum test (see the PDF: Vacuum Error Solutions on how to run this test).
- Vacuum sensor failure – If everything checks out and you can see by the thick ring around the door gasket that when the vacuum pump is on it is pulling a strong vacuum, there is a possibility that you have a Vacuum Sensor failure. You will need to call Harvest Right Support to deal with this issue.
Error – Drying Time Expired. Vacuum Pump turns off, Freezing continues.
- Press CONTINUE to add more dry time. If you get the message again, do the following:
- Your freeze dryer may be overloaded with food, or other material, you are freeze drying. If this is the case, the ice ring that has formed on the inside walls of the chamber may be so thick that the freeze dryer is compromised. If that is the case, do the following:
- Remove the food (or other material) from the chamber. Check to see if it is dry. If the thicker pieces (generally on the bottom shelf) are wet or have a kernel of ice in the center you will need to remove the trays and put them in your freezer.
- Then, press the cancel button to take you to the end of the batch where you can defrost the unit. Close the door and press DEFROST.
- Once your unit is defrosted, you can cool your freeze dryer chamber by starting a new batch and selecting “Pre-Frozen.” After the chamber is adequately cold, take the trays out of your freezer and put them in your freeze dryer. Close the drain valve and press CONTINUE.
- Then press the leaf multiple times until you get into Final Dry. Let the unit finish the batch.
- Vacuum pump may not be functioning well (not pulling an adequate vacuum quickly enough). If this is the case, your pump may need maintenance, repair, or it could need to be replaced.
- Perform a vacuum test to see how long it takes to pull a deep vacuum. Here is the list of steps:
- Unplug and remove the shelf that holds food trays from the chamber.
- Wipe out the interior of the chamber to insure it is clean and free of ice and water
- Drain hose needs to be sloped down to ensure all water is out of it.
- Close drain valve.
- Remove vacuum hose and check “O” rings on both ends of the vacuum hose. Make sure they are in place and are not damaged.
- Replace hose. Hand tighten both connections.
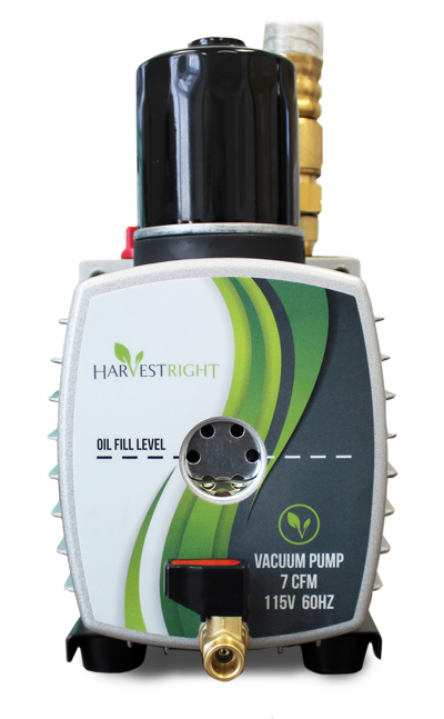
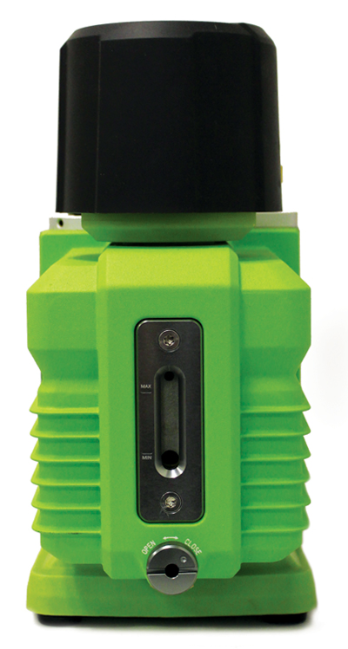
- If you are using an oil based pump, look at the sight glass on your vacuum pump. What is the appearance of the oil; how high or low is it filled? It should be right in the middle.
- If the oil is dirty or cloudy, it should be replaced. Be sure and tilt the vacuum pump forward when removing the oil to get all the oil and water out of the pump.
- Power on freeze dryer; then press the leaf or logo consecutively until the freeze dryer is in the dry mode. Vacuum pump will turn on. It should pull down lower than 500 mT in 10 to 15 minutes. Keep track of how long it takes to pull down. What is the deepest pressure reading that it pulls down to (300 mT to 100 mT is good)? How long did it take to get to the deepest vacuum?
- If the unit will not pull down to 500 mT, (for those using oil pumps) remove the oil demister on the vacuum pump and let it run for a few minutes. Does that help pull a lower vacuum? The demister may just be clogged.
- If you still can’t pull a vacuum below 500 mT, try a toilet paper test. Take a narrow (1 inch wide) piece of toilet paper and hold it above the vacuum pump exhaust with the oil demister removed. Does it blow and shake extensively? Try putting your finger or palm over the exhaust. Does it blow against your hand?
- If the toilet paper shakes substantially, or if you can feel the air blowing on your hand, the freeze dryer likely has a leak somewhere (door, door gasket, vacuum hose, drain hose, etc.)
- If there is very little air coming out of the exhaust, and the pressure is still higher than 500 mT, it is probably a sign that the vacuum pump is bad and needs to be replaced.
- Perform a vacuum test to see how long it takes to pull a deep vacuum. Here is the list of steps:
PRINT GUIDE
DOWNLOAD


